Replacing Controller Triggers and SpringsUpdated 14 days ago
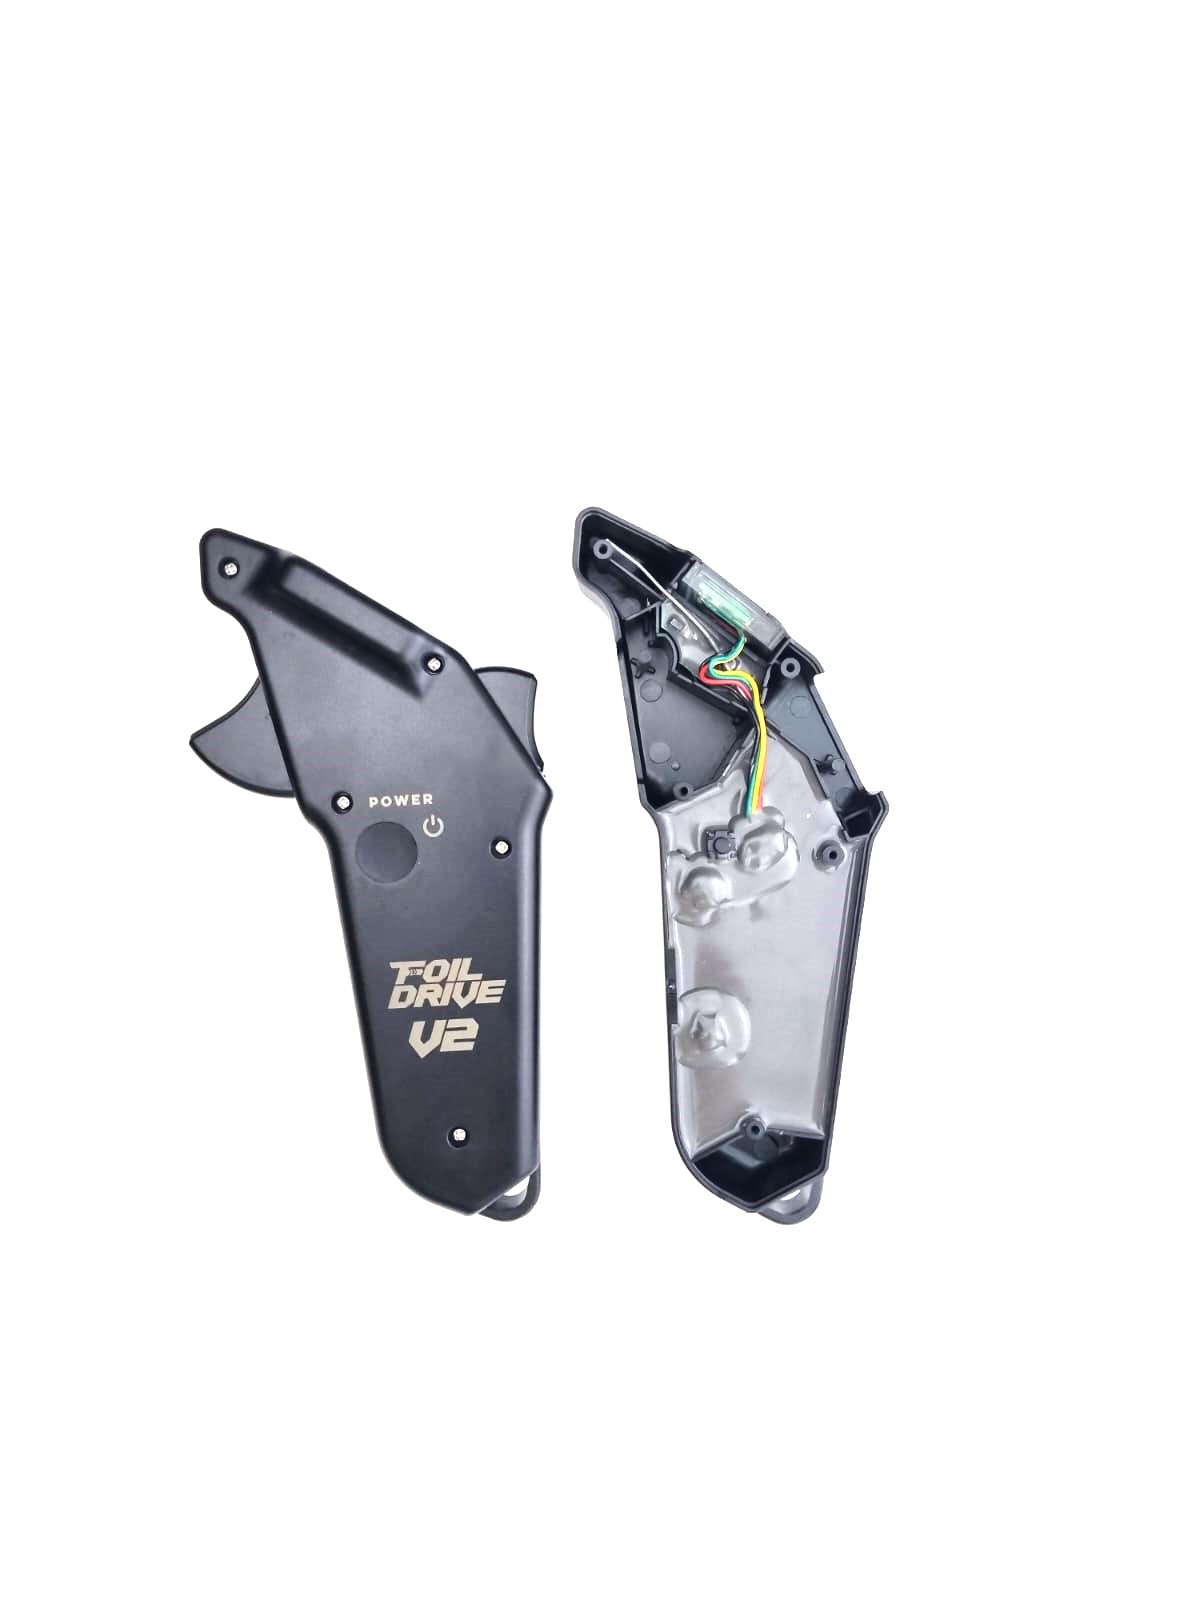
Instructions on how to replace the springs in your Foil Drive Wireless Controller.
If your controller spring breaks, or your triggers need replacing, follow these instructions on how to replace them.
Follow the video and steps below on how to replace your triggers and springs in your wireless controller.
What you will need:
- Small Philips head screwdriver
- Needle nose pliers
Instructions:
1. Take screws off and remove cover from your controller.
2. Remove triggers carefully so the springs don't fling off.
3. Grab replacement triggers and springs from the packet and place them on the bench.
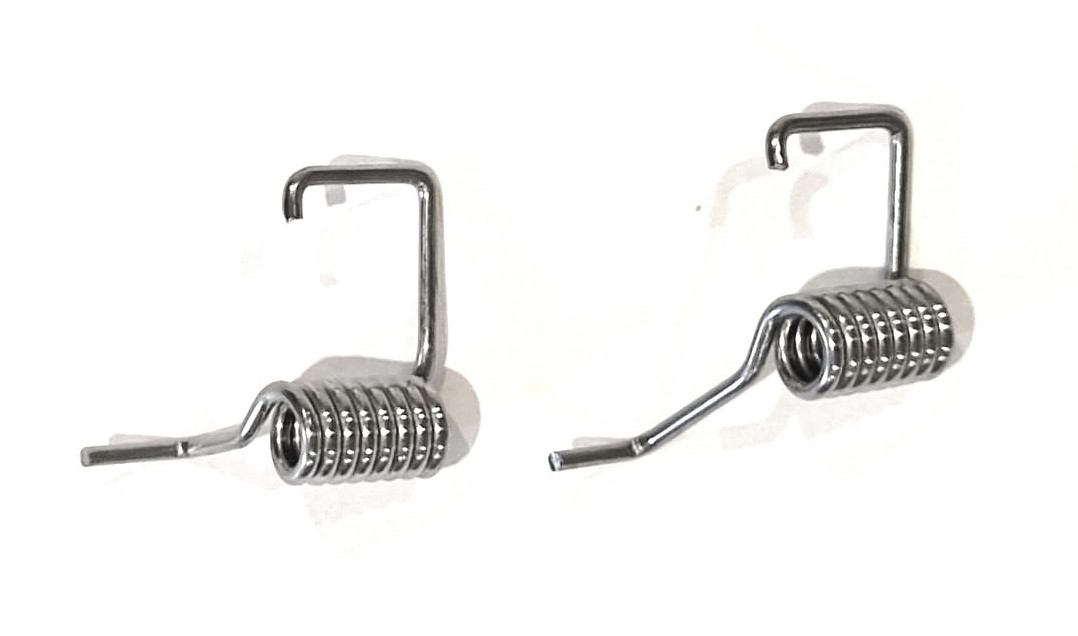
a. Looking closely, there is a spring with a long arm and one with a shorter arm on one end. Both triggers have a 'u' shaped arm which is exactly the same.
 Short Arm (Throttle) Long Arm (Cruise)
4. Do a 'dry run' with the springs so you understand the orientation the spring needs to be in order to be fitted correctly.
5. Grab throttle trigger and place the trigger onto the post. Slightly raise the trigger on the post so it is only 'just' on.
6. Using the needle-nose pliers, pinch the spring with the long arm facing down.
7. Slide the spring underneath the trigger, onto the post and press down. Ensure the arm of the spring is locked into the little recess.
8. Squeeze trigger to make sure it is spring loaded.
Note: If the trigger is not spring loaded, you will need to repeat these steps and ensure the 'u' arm is correctly seated in the recessed housing.
9. Next, pick up the throttle trigger and place on post, ensure there is a gap on the post for the spring to slide in to.
10. Pick up spring with the arm facing down, the u-shape of the spring going into the top recess of the controller.
11. Pinch the spring at the top with the pliers and slide spring onto post. This can be very fiddley.
11. Ensure the spring arm is recessed in the housing.
12. Shimmy trigger down on the post. This one is slightly more difficult than the cruise control trigger.
13. Check trigger is spring loaded. If the trigger is not spring loaded, you will need to repeat these steps and ensure the 'u' arm is correctly seated in the recessed housing.
Once your triggers are fitted correctly, follow the instructions below on how to re-calibrate the triggers.
How to Re-Calibrate Controller Triggers
Instructions:
1. Turn on controller using the power button.
2. Press and hold the cruise control trigger for 3-5 seconds to release the LCK feature.
3. Press cruise control trigger, and single tap of the power button
4. Use short taps of power button to scroll through menu (8 times), Select 9. Calibration
5. Press and hold power button to open calibration menu.
6. Squeeze throttle trigger smoothly in to 100%, the release the trigger.
Ensure it says, 'Cal. OK'.
7. Squeeze cruise control trigger smoothly in all the way. Ensure it says, 'Cal. OK'.
Note: If it does not say 'Cal. OK', you will need to re-do the calibration.
8. To confirm, press and hold power button for about 4 seconds. It will then go back to the main menu.
9. Press cruise control trigger to exit the menu.
10. Squeeze throttle trigger to ensure it reads 100% when fully depressed.
Calibration Did Not Work
If this does not work, carry out a factory re-set on your controller. Click here to access the article.
Once you carry out the factory re-set, return to this video and carry out another calibration.
If this does not work, please email [email protected] with details of your problem as well as photos and/or a video so we can help you troubleshoot.
Related Articles
Corroded Magnets (Older controllers)
Pairing controller to Foil Drive
Troubleshooting Controller Issues
To learn more, check out the other articles on our Help Centre which can be found under the 'Support' tab on the website.
As always, if you have any questions, please reach out to us at [email protected].
Happy Foil Driving!