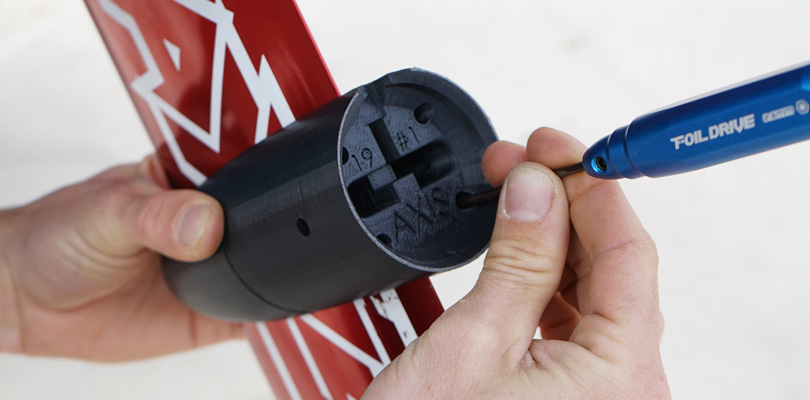
Mounting Custom Foil Drive Mast AdaptorsUpdated 4 days ago
As of Friday the 26th of April 2024, Foil Drive kits now come with a Universal Mast Adaptor. Please click here if you have a Universal Mast Adaptor.
If you have a mast that does not fall within the specifications of the Universal Mast Adaptor, please contact [email protected] to consider a Custom Mast Adaptor. Custom Adaptors can be designed specifically for each mast if required.
This article covers two types of installation:
Option 1. Mounting a V2 Motor Pod & Custom Mast Adaptor
Option 2. Mounting a V1 Custom Motor Pod
Note: More useful V1 Motor Pod and Custom Adaptor Videos at the bottom of this article
Option 1 comprises of 3x External Universal Motor Pods and requires the use of Internal, Custom Mast Adaptors. These adaptors are a firm, plastic material and will have the name of your mast written on them.
Option 2 is the original Foil Drive Adaptor and comprises of 2x pieces only made of a hard, plastic material. No external pieces are required, and the pod will have your mase name written on the bottom.
If the adaptor you have is a soft, rubber like plastic, you have a Universal Mast Adaptor, click here.
Option 1. Mounting a V2 Motor Pod & Custom Mast Adaptor
Watch the video below to learn how to correctly install your Custom V2 Motor Pod.
What you will need:
- Foil Drive Hex Driver
- M3 x 12mm bolts (Different to v1 pod screws, these are now the same bolts you use for the Puck!)
- Front + Rear outer Universal Motor pod + Custom Internal Mast Adaptor to suit your mast
Instructions:
1. Orientate your pod on your mast - Pointing text on pod towards the base plate (Made to fit between 18cm-20cm from base plate. Only relevant for tapered masts).
Note: On a tapered mast, if you're having trouble getting the pod onto the mast, insert the pod in the thinner section of the mast and slide it down, close to the position you would like to secure it.
3. Insert each bolt on the outer shell until it grabs the front cone, then position your pod (Shimmy up and down) to its final position.
4. Once you have the pod where you want it, tighten each bolt to take up tension.
5. If you notice there is movement in the pod and it seems slightly too big, you can pack out this space using single layers of electrical tape underneath the pod. Using the tape will also prevent scuffing your mast!
Want to know more? Watch below for the Tech Talk
Note: This video was published prior to the release of the Universal Mast Adaptors and features the now Custom Mast Adaptors. The Universal motor Pod (Outer pieces are cross compatible).
____
Option 2. Mounting a V1 Custom Motor Pod
What you will need:
- The two pieces of the Custom V1 Mast Adaptor Motor Pod
- Hex 2.5mm Driver
Instructions:
1. Clean and dry your mast before installing the motor pod. Trapped debris can damage your gear.
2. Using the supplied driver, remove the 3 external puck bolts to detach the pod from the puck.
3. Remove the 4 internal pod bolts, separating the two halves.
4. Ensure the pod is the right way up with the square notch pointing towards the base plate of your mast. Position the Motor Pod at the desired height and re-install the 4 internal pod bolts
Do not over-tighten the bolts as it will strip the moulded inserts out of the pod. Bolts should be finger tight, enough so the pod doesn’t move up and down. A small gap between the two halves is important in order to create clamping force.
A 1-5mm gap between pod halves is normal.
5. Once you’ve found the optimum ride height for the pod, lock it into place by applying ¼ turns until the pod can no longer move by hand, tighten no more.

6. Install the motor/puck onto the rear of the pod, making sure it slides in smoothly, without force and everything lines up.
7. Line up the 3 exterior screw holes and re-install the screws.
MOTOR POD POSITIONS
Most riders run their motor appx. 20-25cm below the board, this is a good starting point to adjust from. Small adjustment is available with most mast profiles, some tapered masts such as Armstrong and Cloud 9 have less adjustability.
You can coil excess of cable near the box using the included silicon tie.
HIGH POD POSITIONS are great for most riders. The motor will only be in the water long enough to catch the wave. The system will exit the water as soon as you’re on foil, providing zero drag or interference.
LOW POD POSITIONS are perfect for learning and e-foiling as you can maintain constant power and utilise the length of the mast without the system exiting the water. This also makes catching faster waves easier. When more speed is required, you’ll need longer periods with the motor in the water.
Tapered masts will need to have thin layers of tape added to pack out the space.
Related Articles - Click to read:
Choosing Correct Custom Mast Adaptor
Measuring Mast for Custom Mast Adaptor
Compare Motor Mounting: Universal vs Integrated Masts
Universal Mast Adaptor | Tech Talk
To learn more, check out the other articles on our Help Centre which can be found under the 'Support' tab on the website.
As always, if you have any questions, please reach out to us at [email protected].
Happy Foil Driving!