Fixing Exposed Copper Wiring on Foil Drive™ StatorUpdated 3 days ago
If you have disassembled your motor and noticed you have exposed copper wiring on your stator, fear not - it is not as bad as it looks!
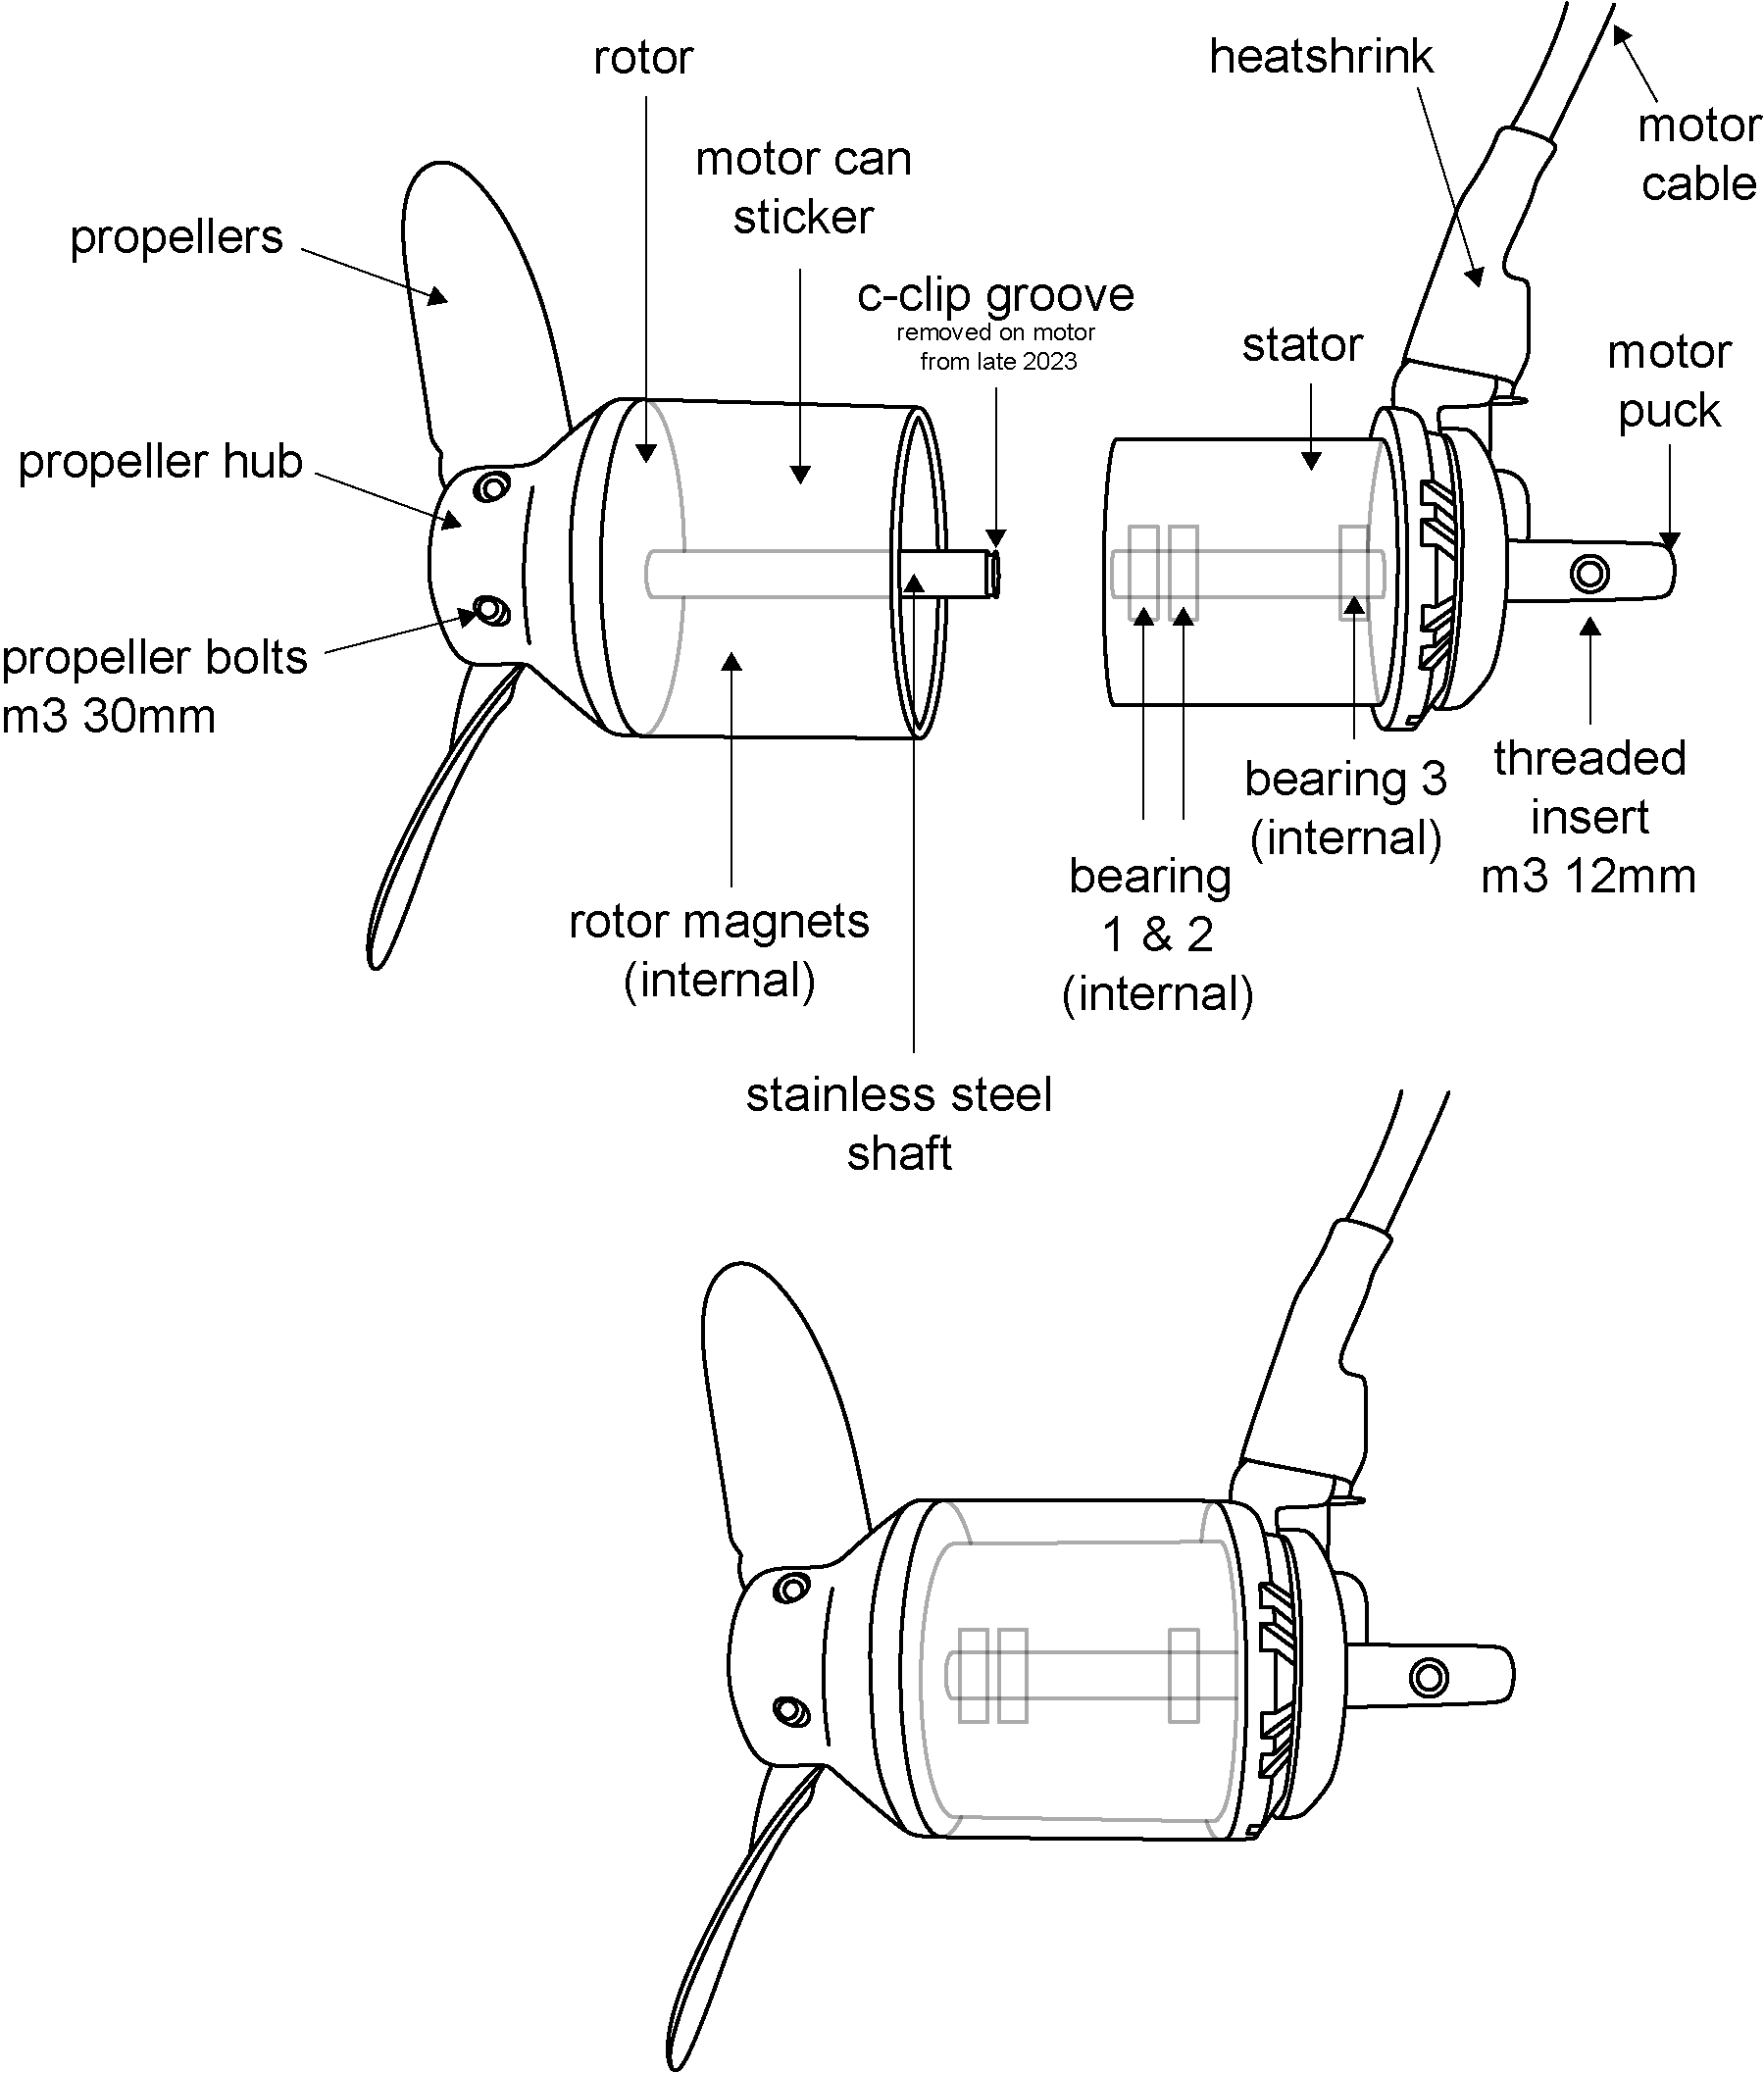
Below is a detailed diagram of the parts of your Foil Drive™ motor. In this video series, you will be working with the stator.

What Does Exposed Wires Look Like?
Below are some examples of exposed copper wiring. The degree of exposure can vary from very minute exposure as seen in the first image, to quite substantial exposure as seen in the other images below.
Despite varying in condition, all of these cases are fixed in the same manner.


How to Cover Exposed Wiring
You will need:
- Painter's tape or similar.
- Selleys Marine Flex adhesive sealant, or equivalent.
Instructions:
1. Cover the ceramic bearing with a bit of painter's tape (or similar) to protect it.
2. Using a marine grade flex sealant, apply a small amount over the exposed wiring.
I.e., Selleys Marine Flex Sealant
Note: Do not apply too much! Make sure it does not protrude any further than the rest of the stator.
3. Allow to fully cure before moving to the next step.
RE-PAINTING THE STATOR
You will need:
- Wet and dry sandpaper around 400grit and 120git (not super important exactly which grit you use, but starting with a more abrasive sandpaper will make light work of the clean-up. Finishing with a finer grit sandpaper is important for a smooth finish).
- Isopropyl cleaning alcohol or similar cleaning agent.
- Paper towel or clean rags
- Painter's masking tape
- Good quality black rust preventative epoxy enamel spray paint for metal surfaces (I.e. Anchor Sheild) *
* For our US customers, this product or similar can be purchased locally: Amazon.com: MowerPartsGroup Lubricant/Corrosion Inhibitor, 11.75 oz.: Automotive (Also available at Home Depot)
Instructions:
- Clean the stator with isopropyl cleaning alcohol.
- Use wet and dry sandpaper to remove any section of surface corrosion and ensure the whole stator is a smooth surface. There is no need to take this part back to bare metal.
- Clean the stator once again with alcohol to ensure a clean surface ready for paint.
- Ensure you have masked up the ceramic bearing on both ends of the motor to prote
ct from over spray. Also mast up the aluminium base of the stator as this does not need to be painted.
- Use the epoxy enamel paint (I.e., Anchor Shield) to apply 3 or 4 very light, consistent coats to achieve complete coverage of the stator.
- Wait until the paint is completely dry before reassembling the rotor back onto the stator.
For a detailed guide on how to carry out a full rotor and stator refurbishment, click here.
If you have accidently broken or damaged your ceramic bearings when disassembling your motor, click here.
If you are still unsure, or you are not confident to carry out the repairs or service yourself, please email our support team on [email protected]
Related Articles - Click to Read:
Motor Cleaning and Maintenance
Foil Drive Motor Design | Universal
Replacing and Securing Ceramic Bearings on Foil Drive Motor
Foil Drive Rotor Refurbishment
To learn more, check out the other articles on our Help Centre which can be found under the 'Support' tab on the website.
As always, if you have any questions, please reach out to us at [email protected].
Happy Foil Driving!