
Universal Mast Adaptor InstallationUpdated a month ago
The Universal Pod Adapter allows a Foil Drive Pod to be securely mounted to a wide range of foil masts, including masts with different widths, tapers and shapes.
While installation is straightforward, selecting the correct nose cone and key size is critical to achieving a secure, tight fit.
For video instructions, see: Universal Mast Adaptor Installation
What you need
Before starting, make sure you have:
- Universal Pod Adapter
- Long and short nose cones
- Universal Adapter keys
- Pod bolts
- 2.5 mm Allen key/driver
- Your foil mast
1. Choose the correct nose cone 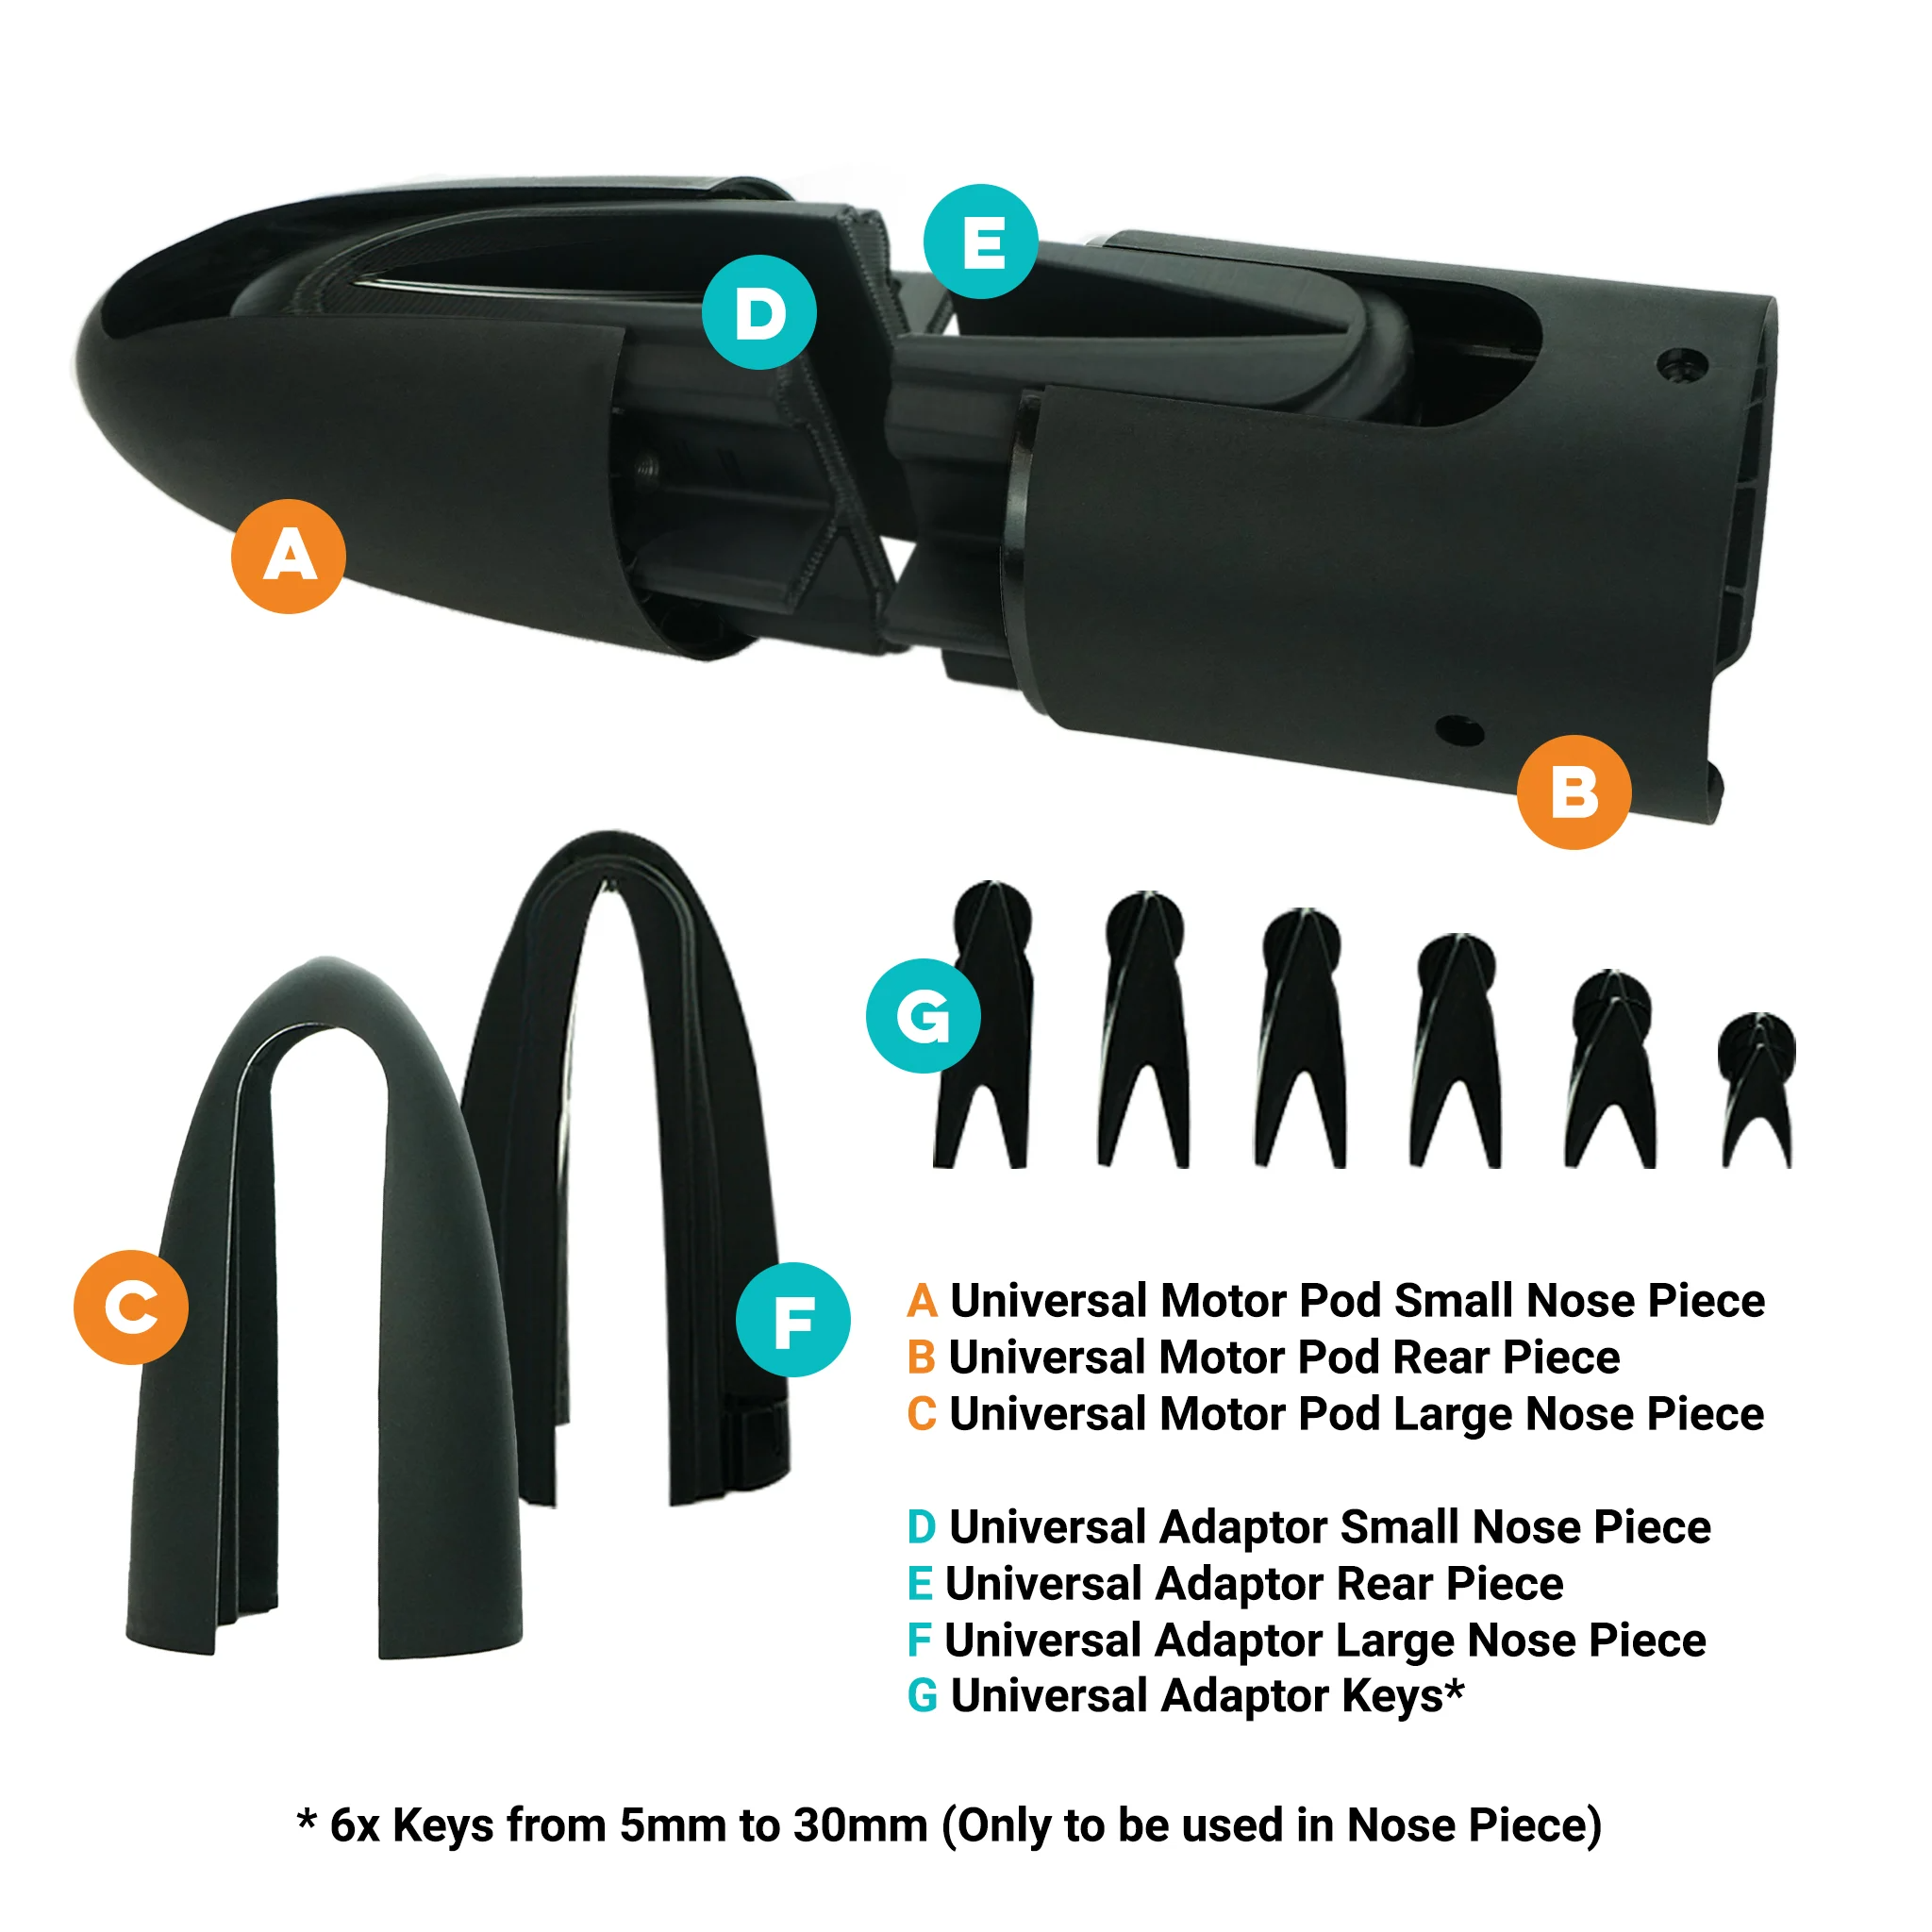
The Universal Pod comes with long and short nose cones.
Choose the nose cone that best suits the shape and width of the mast where you want to install the Pod.
How to choose
Start by fitting the nose cone over the front of the mast and selecting an appropriate Universal Adapter key.
The keys are available in different sizes, increasing in 5 mm increments (5, 10, 15, 20, 25 and 30 mm).
Try different combinations until you find the one that provides the best fit.
The correct fit
The Pod should not be loose on the mast before the bolts are tightened, but you also should not need excessive force to position it.
A small gap between the nose and rear sections before tightening is normal and desirable. The Pod bolts compress the flexible internal components together to create a tight fit around the mast.
If the two Pod halves can easily be pushed together and moved around on the mast without the bolts providing compression, the key is likely too small.
2. Assemble the Universal Adapter
Once you have selected the correct key and nose cone:
- Insert the Universal Adapter key into the nose cone.
- Make sure the key is correctly seated in the moulded section.
- Fit the rear section of the Pod.
- Ensure the rectangular opening faces downward.
- Place the Pod over the mast and check the fit.
There is no specific orientation for the nose cone or rear section beyond ensuring the key is correctly seated and the Pod is positioned correctly on the mast.
3. Pre-start the Pod bolts
This is particularly important on wide or heavily tapered masts.
Some mast shapes can force the two Pod halves apart, making it difficult to align the bolt holes with the threaded inserts.
To make installation easier:
- Slide the Pod towards the top of the mast.
- Bring the two Pod halves together.
- Insert each Pod bolt.
- Start each bolt by hand, engaging approximately 2–3 mm of thread.
- Do not fully tighten the bolts yet.
- Once all bolts have been started, slide the Pod down the mast to your desired position.
Starting the bolts first prevents the Pod halves from spreading apart and makes it much easier to position the Pod accurately.
4. Tighten the Pod
Once the Pod is in the correct position:
- Tighten each bolt gradually.
- Work around the Pod, tightening the bolts evenly.
- Do not fully tighten one bolt while leaving the others loose.
- Continue tightening until the Pod is securely compressed around the mast.
The injection-moulded outer sections compress the softer internal components around the mast as the bolts are tightened.
The finished Pod should be very stiff and secure, with minimal movement on the mast.
What should the Universal Adapter look like when tightened?
Every mast has a different shape, so the Universal Adapter may look slightly different depending on the mast.
It is normal for the Universal Adapter key to sit slightly proud of the inner section or for there to be small variations in the shape of the compressed Pod.
The Universal Adapter is designed to deform and compress around different mast shapes to achieve a secure fit.
5. Install the motor and tape
Once the Pod is securely mounted:
- Install the Foil Drive motor.
- Install the rubber motor cable guide.
- Apply the recommended tape/anchoring system.
The motor installation and tape provide an additional anchoring point for the system.
For motor installation instructions, see Motor Installation Guide.
Important installation tips
Always select the correct key first
Do not simply choose a random key and force the Pod into position.
The correct key and nose cone combination is essential for a secure fit.
Start all bolts before positioning the Pod
If the Pod is spreading apart on a wide or heavily tapered mast, pre-start all four bolts with 2–3 mm of thread engaged, then slide the Pod into position.
Tighten the bolts evenly
Gradually tighten all four bolts rather than fully tightening one bolt at a time.
A small gap before tightening is normal
The Pod does not need to be completely compressed by hand before tightening.
The bolts are designed to compress the Pod around the mast and create the final secure fit.
Storage and transport
The Universal Pod contains flexible components that can deform if compressed for extended periods.
Do not store the assembled Pod underneath a board or other heavy equipment for long periods.
For storage:
- Keep the internal components supported by the moulded plastic sections.
- If transporting the Pod, remove the nose and rear sections from the mast where practical.
- Bolt the Pod components back together for transport so they remain supported.
- Avoid storing the flexible components compressed inside a board bag for extended periods.
This helps prevent unnecessary deformation over time.