
External Antenna Installation GuideUpdated 2 hours ago
Before Installation
Check Your Mast Plate Bolt Length
The antenna plate adds approximately 2 mm of additional height between your board and Foil Drive system.
Depending on your board, foil track depth, shims and setup, your existing mast plate bolts may no longer provide sufficient engagement with the T-Nuts.
Longer mast plate bolts are available:
- 85 mm – Assist MAX
- 65 mm – Assist Slim
Watch how to measure the bolt length here
Nose Cone Foam
Foam is supplied with the External Antenna to compensate for the additional height created by the antenna plate.
Install the supplied foam onto your Nose Cone as required so the electronics box and Nose Cone remain level when mounted to the board.
External Antennas For Max+
Important compatibility update
The current MAX external patch antenna (SKU FD167-1 & FD167-2) previously included a small locating nub on the front of the antenna footprint. This version is not compatible with the MAX+ unit 'out of the box', however customers can easily remove the nub themselves (no tools required), to be able to use it with their Max+ system.
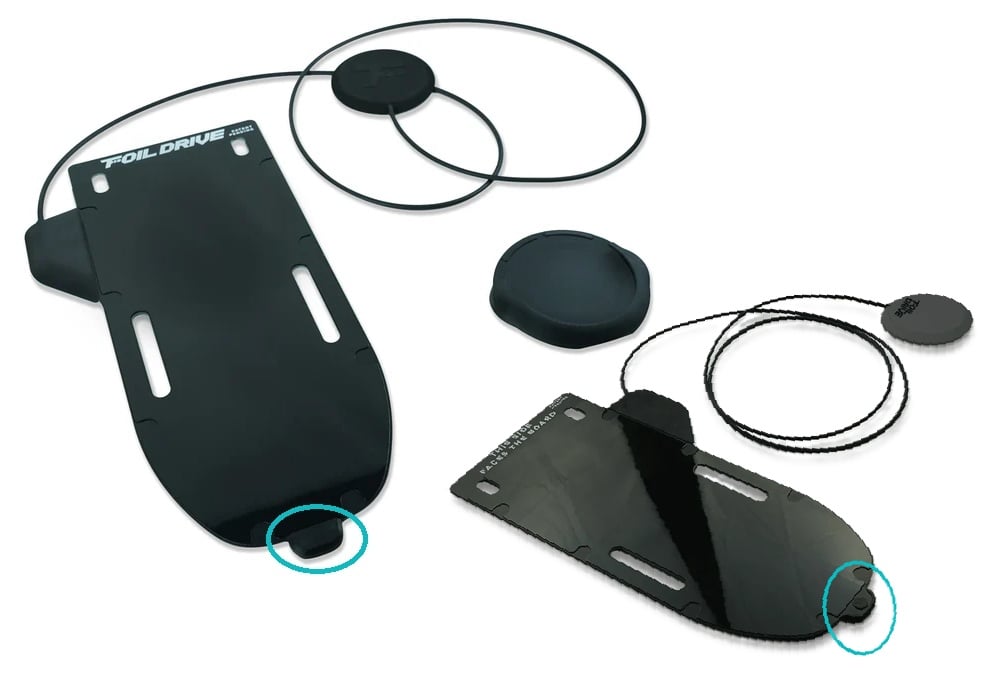 Using your fingernails, or a small flat head screwdriver, if necessary, gently lift the top of the nub off the plastic.
This is held on by glue, and should not require too much force. The round piece on the nub on the other side should pop out easily once this is removed.
As an inline change, we have now modified the MAX antenna by removing this nub.
Effective 8 October 2026, all MAX external patch antennas leaving HQ will have the nub removed and will be compatible with MAX+, MAX and SLIM units 'out of the box'.
How to Install the External Antenna
1. Position the Antenna Plate
Place the antenna plate over your board's foil tracks.
The side marked:
THIS SIDE FACES THE BOARD
must face the board.
Position the plate with the Foil Drive logo facing toward the front of the board.
2. Position Your Foil Drive System
Place your Gen2 or Gen2.5 Foil Drive system on top of the External Antenna plate.
Use the raised guides along the rear and side of the antenna plate to correctly position the electronics box.
3. Install the Mast Plate Bolts
Check that the mounting holes through the Foil Drive system, antenna plate and foil tracks are correctly aligned.
Install your mast plate bolts and securely engage the T-Nuts.
Important: The External Antenna adds approximately 2 mm to the mounting height. Confirm that your bolts are long enough to securely engage the T-Nuts before riding.
4. Secure the Antenna Cable
Before applying tape, thoroughly clean the board surface.
Remove any:
- Wax
- Sunscreen
- Salt
- Sand
- Dirt or other contamination
Run the antenna cable in a straight line along the bottom of the board and toward the nose.
Use a small piece of tape initially to hold the cable straight and under light tension.
Once correctly positioned, tape the entire length of the cable securely to the board.
Tip: Where possible, use a continuous length of tape that extends around the nose and onto the top of the board.
This avoids leaving exposed tape edges underneath the board that may begin peeling back while riding.
5. Position the Antenna Pad
Turn the board over and position the antenna pad on top of the nose of the board.
The exact position on the nose is not critical, provided the antenna is correctly mounted on top of the board.
Secure the antenna pad firmly in place.
6. Finish Securing the Cable
Continue the tape around the nose of the board, creating a secure and continuous taped path from the underside of the board to the antenna on top.
Make sure the cable is fully secured along its entire length and cannot move freely while riding.