
How to Remove a Seized or Tight Motor Rotor from the StatorUpdated 20 days ago
If your motor rotor is difficult to remove by hand or has become seized onto the stator, this guide explains the safest way to separate the motor without damaging the bearings or internal components.
Before You Begin
You will need:
- 2.5 mm hex driver
- Lubricant (WD-40, Inox or similar)
- Motor Separation Jig (alloy mounting plate, mounting screws and 10 mm punch) Highly recommended
Important: The Motor Separation Jig is strongly recommended. It keeps the punch perfectly aligned with the motor shaft, significantly reducing the risk of bearing damage during removal.
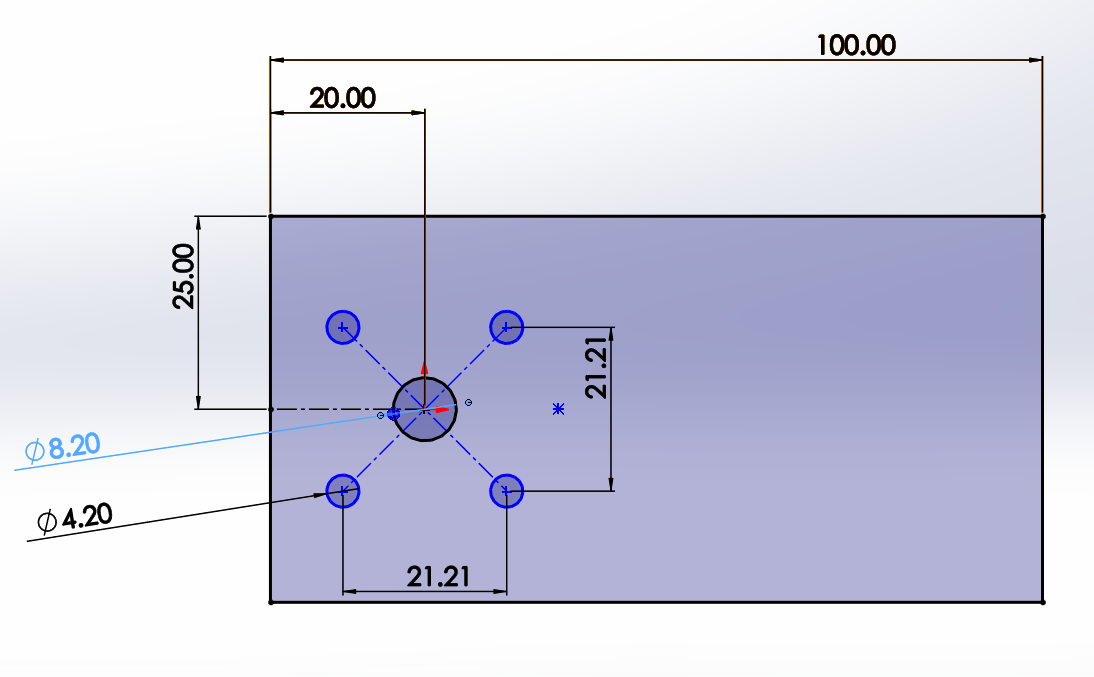
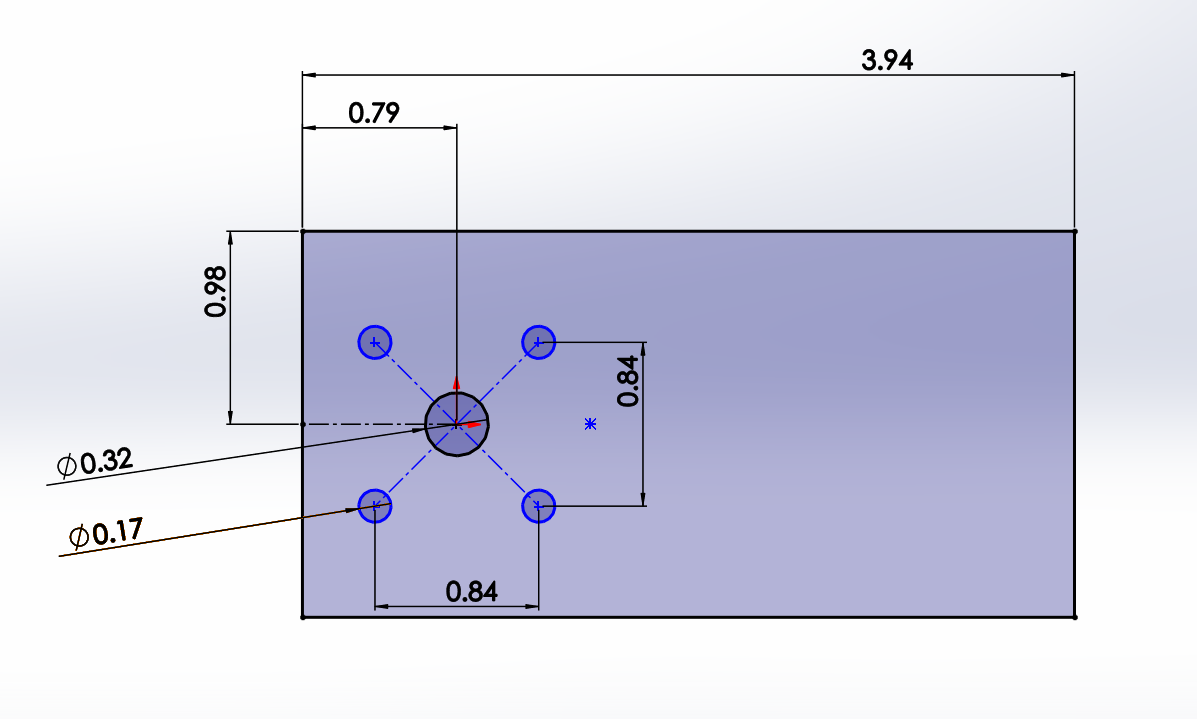
See the below pics for measurements and the DXF file if you would like a local machining shop to produce a plate for you.
Measurements in millimetres:
Measurements In inches:
motor holder 8mm pin 3D model.STEP 4.5KB
motor holder 8mm pin.DXF 23.2KB
motor holder 8mm pin.DWG 9.7KB
Removing the Rotor
Step 1 – Apply Lubricant
If the rotor feels seized or difficult to remove:
- Spray a small amount of penetrating lubricant onto the motor shaft.
- Allow it to soak for several minutes before attempting removal.
Step 2 – Mount the Motor
Secure the motor to the Motor Separation Jig.
Mount the jig either:
- In a bench vice, or
- To a solid wooden workbench.
Ensure the motor is firmly secured before proceeding.
Step 3 – Insert the Punch
Insert the 10 mm stainless steel punch through the precision-machined guide hole in the jig.
This guide keeps the punch perfectly centred on the motor shaft.
Step 4 – Separate the Rotor
Using a hammer, apply firm, controlled taps to the punch.
As the shaft moves downward through the jig, support the rotor with your free hand.
Once released, the rotor will separate from the stator.
Reinstalling the Rotor
When reinstalling the motor:
- Hold the rotor with both hands.
- Carefully align it with the stator.
- Slowly lower the rotor onto the stator.
- As the magnets begin to attract, maintain control of the rotor until it is fully seated.
Watch the video below for a complete demonstration of the rotor removal process